Thursday 2 August 2018

Rhino's go marching by


I love creating cards and gift wrapping for all the presents I give to the people in my life. Whether they are a family member, a friend or an acquaintance, I get a thrill out of seeing them open the envelope for the card or the gift wrapping for the present as much as I enjoy them actually loving the present. Being able to give a special present in a lovely little box, bag or gift wrapping and having the theme run through from the card to the wrapping is something that I love being able to do.

This beautiful card and gift bag I have made for this blog is just so sweet that I had to share it. I do have 2 people to thank for the inspiration for both the card and the gift bag. The Corner Folded Card was from Sage Kimble @ Stamping Madly and the Envelope Satchel was from Jenny Hayward @ A Stamping Journey.


The stamp set I have used is Animal Outing along with the matching Design Series Paper (DSP), Animal Expedition. The cardstock colours are then easily chosen because in the catalogue, when you have a DSP, the list of colours can then be found underneath it. There are also colour cardstock packs that can be purchased in conjunction with the DSP and these include three of the coordinating colours. This takes even more of the guess work out of the combinations that can be made.


The dimensions and instructions on how to make the bag can be found at A Stamping Journey. I have altered it a bit to fit what I wanted it for but I have been able to fit the card with the gorgeous little rhino and the present into the bag.

Disclaimer: I am unable to show the present at this time as the person who is receiving it may read this blog and I don't want them to see the present too early. If you wish to see the present head on over to my Facebook page after Tuesday 7th August and there will be a picture and the link to the page of the gorgeous and talented Sarah at Entwined Wire Designs.

Monday 9 July 2018

Colour Coaching

With the revamp of the colours in the new annual catalogue for 2018-19 Stampin' Up! have provided us with a wonderful tool with the colour coaching sheets. These sheets have ALL the colours in the catalogue starting with the new In Colours for season 18-19, continuing on with the In Colours for season 17-18 and then all the other colours that Stampin' Up! provide. With each colour as a main colour in each section the colour coacher then provides three different suggestions of colours in the catalogue that will go with that main colour. If you have used Stampin' Up! products before you will know that this is a very handy resource as everything then coordinates, the cardstock, the Designer Series Paper (DSP), the inks, the Stampin' Writes and the Stampin' Blends.

A4 printed sheet with the 18-19 In Colours and their suggestions
 I wanted to be able to provide these sheets to the ladies that attend my classes regularly but didn't want to just give them stapled together sheets of A4 paper and say here you go. So I got my thinking cap on as to what I could do and came up with making a handy little book that can be stored with your stamps and pulled out whenever you have a problem with trying to think of colours to put together. This is the little book:


I printed the nine pages onto plain white paper, then cut them into the rows making sure to leave an extra 2cm tab to be able to join to the next row.


I then put double sided tape on the front side of the tab and joined each row together as shown below:


Using the scorer on the cutter I scored down each line so that I had an easy line to fold each row. I then folded these into an accordion fold, starting with the tab at the Pineapple Punch end so that the right sides were facing each other.


Once this was done I then cut a piece of cardstock 16.2cm x 10.5cm, scoring at 7.5cm from each end of the cardstock to make a book cover. Then cut 5 pieces of DSP, four pieces (for the outside and inside of the front and back covers) at 10cm x 7cm and one piece (for the spine) at 10cm x 1cm.


Then I stuck the tab that is still exposed from on the Pineapple Punch side to the left hand side of the inside of the cover. Making sure to match up the folds with the white paper and the left hand side of the spine. Then stuck the DSP for the inside over the tab so that it can not be seen.


This was then repeated for the back cover as well, sticking the exposed tab at the Early Espresso end to the inside of the back cover, making sure to match the folds together and then sticking the DSP to the inside to cover the exposed tab.

When altogether your book should open easily to show a little book of awesome colour.


And as I am giving these books to the ladies that attended my last class I have packaged them up in a bag with ribbon and a tag.


If you have any questions or would like to order one from me please contact me:

Email: jodi@ink-possible.com

Facebook: https://www.facebook.com/jodiinkpossible/

I look forward to hearing from you.

Cheers and happy stampin'

Jodi xo 


Sunday 17 June 2018

Midnight Inklings Team Blog Hop - New Annual Catalogue 2018


This has been on my mind all week, writing this blog. I'm not very good at blogging, mainly because I just don't have time but also because I am not very good at it. I see everyone else's blogs and I just feel like I have no creativity when it comes to blogging or designing my blog. I don't even have the time at the moment to try to insert my logo onto the title page correctly.

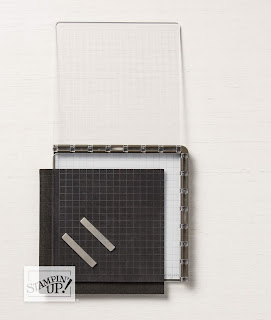
Anyway, this blog is not about me not having time to make my blog better but about the new annual catalogue and the gorgeous and amazing products that can be found in it. I only have a limited amount of what is new in the catalogue but I do have the one tool that is making all our lives, as stampers, so much easier these days and that is the Stamparatus.


I have managed to incorporate this blog AND preparing for my Share What You Love card class on Sunday 17th June, which has saved me time. The Stamparatus has helped me to get my preparation done for the class as well as take stage photos for this blog to explain how this fantastic tool can help with the fiddly little projects we find ourselves making.

As I said I am doing a Share What You Love card class and this is incorporating the bundle that was on offer to all customers during May. I have used the examples that were shown with these bundles as the cards that the ladies will be making in the class. The third card that we will be making is a bit more advanced and I have been able to use the Stamparatus to put the Congratulations together.


Using the Make a Difference Photopolymer Stamp Set I have used the Stamparatus to step stamp the letters onto the precut banner. The following photos show how this worked:


Preparing to add the first letter, the capital C. The washi tape is positioned so that
the six precut banners all go in exactly the same place so that the C is stamped in
exactly the same place on each banner.
All the capital C's have been stamped and are all in the same place.
Next is to stamp the rest of the letters.
Being able to move the clear plate up and down in steps means that you are able
to line several letters up at a time and complete a banner quickly and easily.
The Stamparatus helps with two and three step stamping as well and comes with a clear plate that can be used at the top as well.

Thank you for visiting my blog and hope you have enjoyed the Stamparatus review.

Cheers and happy stampin'

Jodi xo


Midnight Inklings Team Blog Hop - New Annual Catalogue 2018 – Participant List

5: Jodi Gerardis (You are here)

Product List